TeamSwift

Home of the Suzuki mini-compacts ! Your Home for all things Suzuki Swift, Geo Metro, Holden Barina, Chevy Sprint, Pontiac Firefly, and Suzuki Cultus. TeamSwift is a technical performance oriented community!
It is currently Fri Nov 24, 2017 10:54 am

Underbody braces, turbos and more!

All times are UTC - 5 hours


Post new topic Reply to topic  [ 86 posts ]  Go to page Previous  1, 2, 3, 4
Author Message
PostPosted: Thu Aug 16, 2012 4:55 pm 
Offline

Joined: Fri May 11, 2012 11:27 am
Posts: 3
Location: Argentian
Hey by any chance do you have the Diameter for the bushing that you have put .??? thank you.

Teeth wrote:
I also tried stuffing the bushing in the slightly larger diameter pipe I had used to pull it out first, but had trouble getting my threaded apparatus to grip enough to pull it in. I ended up cutting them in half after all, figuring that if I ever want to replace my control arm they'll be a hell of a lot easier to swap. Chef's knife from the kitchen turned out to be the best implement.

Image

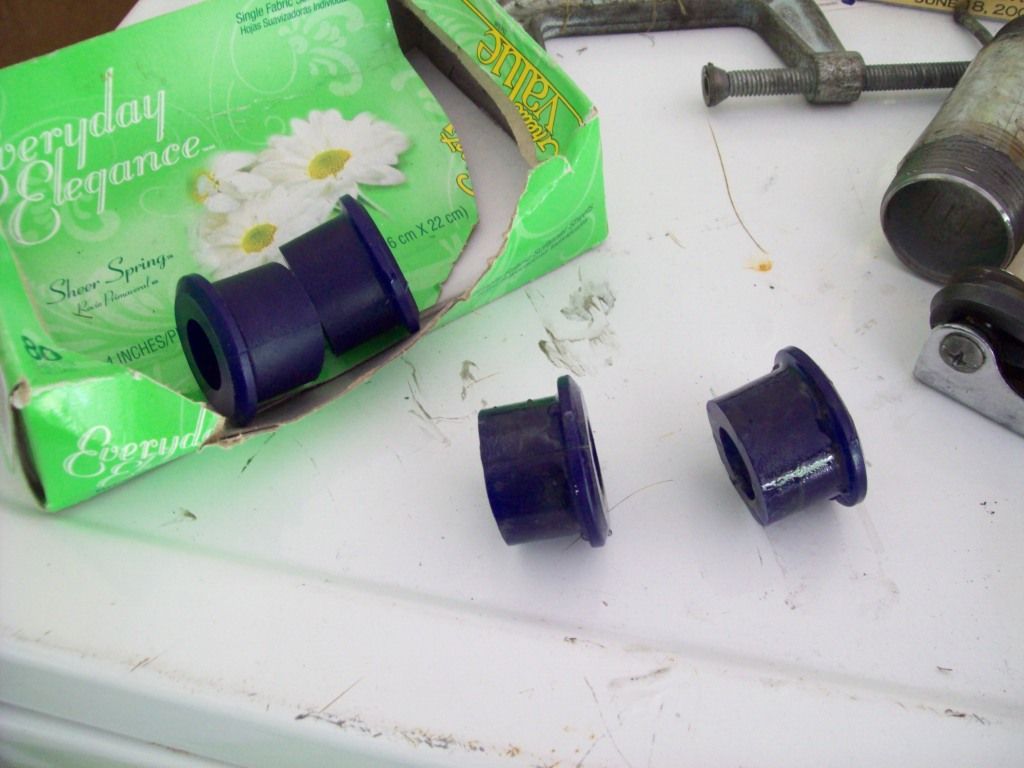
I still needed the carriage bolt to push the crush tube in and make sure both halves were seated properly.

Image

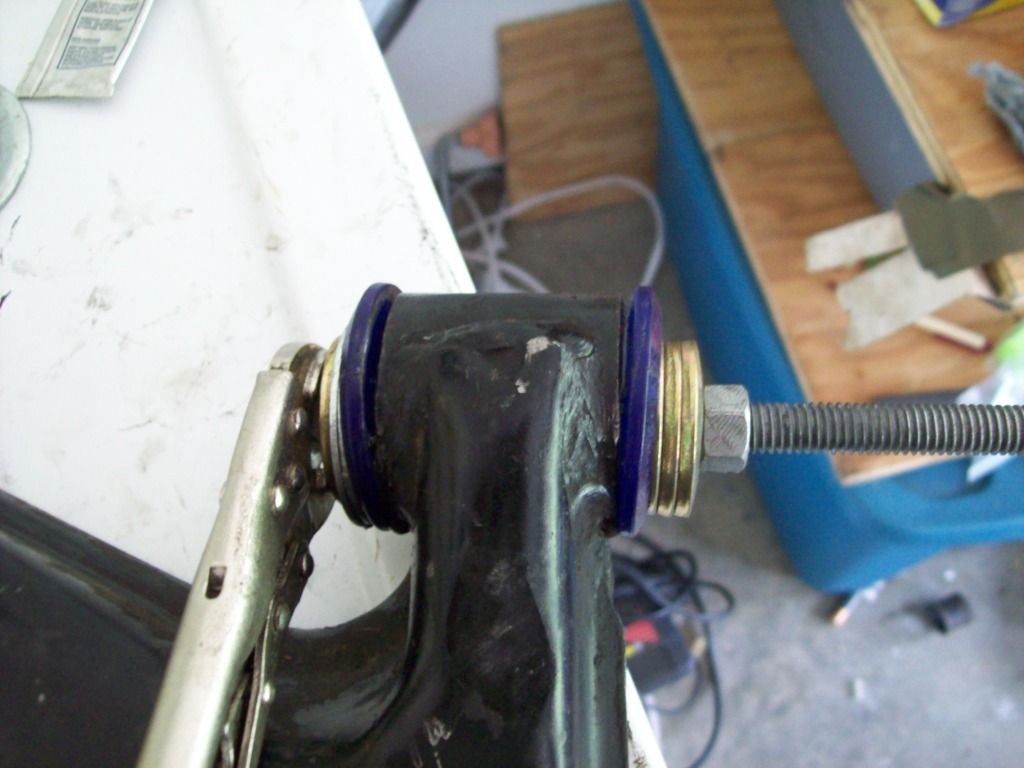
Here's everything almost back together. Since I got the Superpro caster bushings for $20 on sale from 185 performance, I did not get the shims that come with the Whiteline kit. I added an extra washer in an attempt to get just a little more caster--I haven't seen any pictures of anybody else's bushings in place, so I hope I did this correctly.

Image

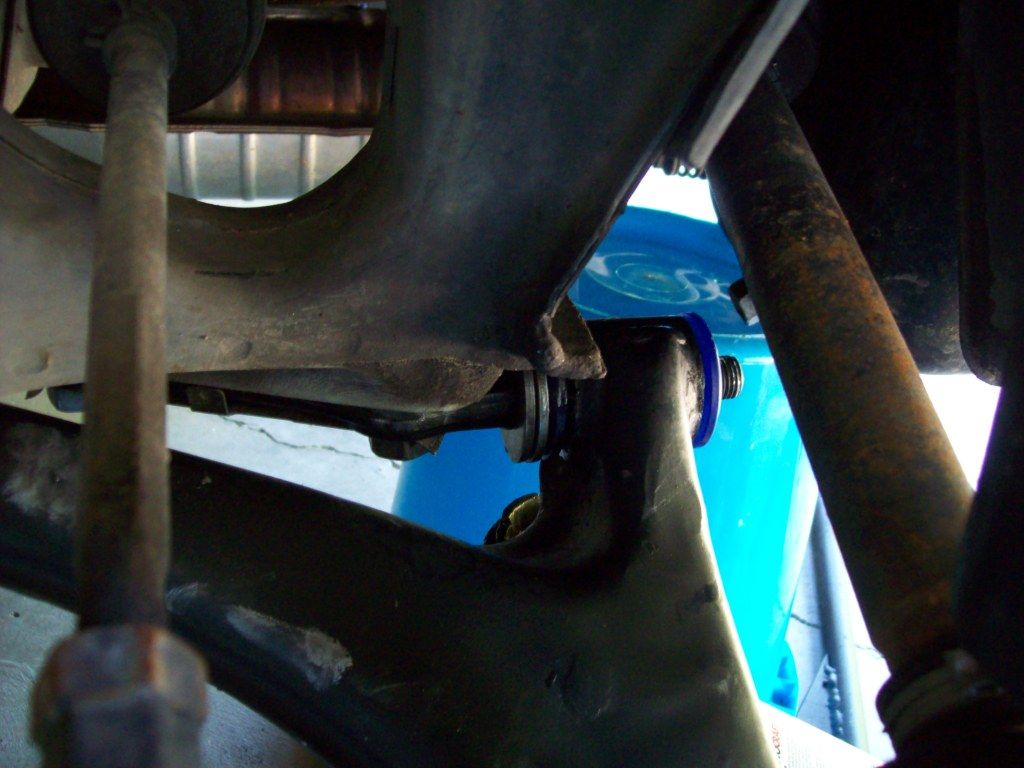
Here's everything completely back together :D Notice that I had to swap the lock washer with a thinner one to make everything fit and that the bolt is now just flush with the retaining nut, so that's as much caster as I can get with shims and bushings I guess.

Image

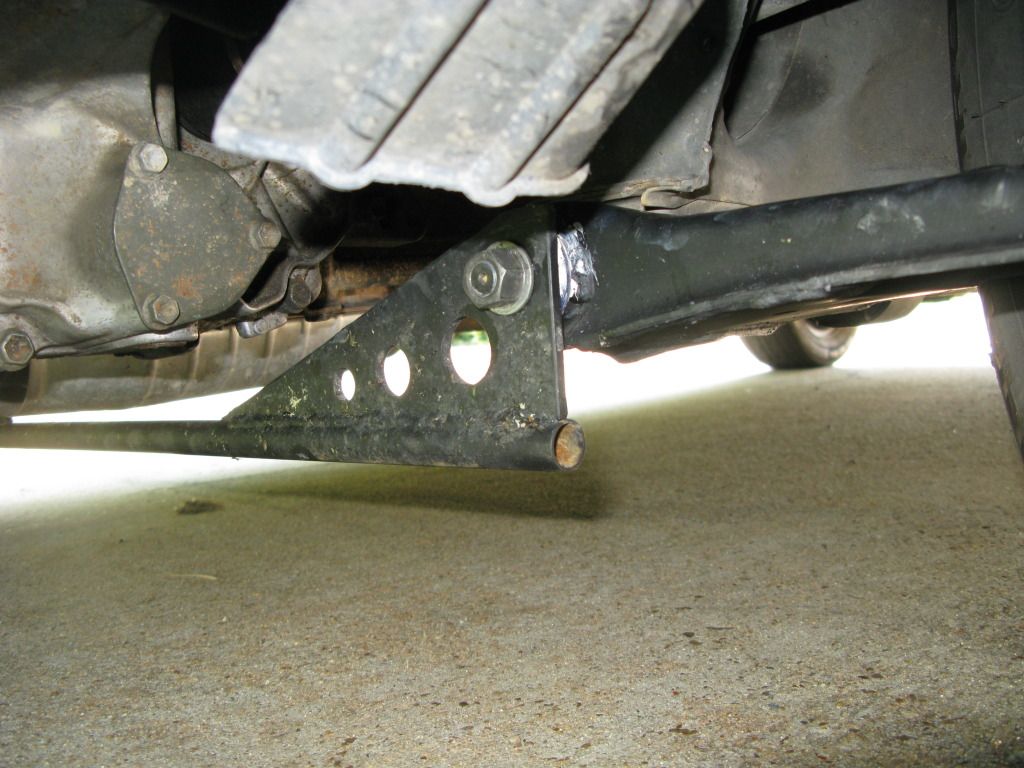
The effects are fairly subtle in ordinary driving, but the car does seem a bit better planted--I expected steering effort at low speed to increase dramatically, but not so much after all. I had already gotten the front of the car much more grip by removing the front swaybar entirely, but, for what it's worth, I can now take the average freeway ramp around here at better than 50 on my cheap DD tires, so grip is good, and where I was a little too loose before I think the stiffer bushings helped to tighten things up again in spite of any further increased grip at the front. I am now just about perfectly neutral with the ability to get oversteer with trail braking if I want it--follow the Spanish Inquisition Racing thread in track talk if interested in the rest of the set up.

If anyone is reading this in the not too distant future and looking for bushings, try searching by part number at 185 performance as they may discounted for clearance.

http://store.185performance.com/


Top
 Profile  
 
PostPosted: Thu Aug 16, 2012 8:30 pm 
Offline
User avatar

Joined: Sun Dec 05, 2010 5:56 pm
Posts: 1035
Location: Wahiawa, HI
I don't have a caliper, but Superpro publishes the dimensions for the part here:

http://www.superpro.com.au/trade/index.php?view=part&id=SPF0678K


So, 33.3mm OD, but they don't give you the flange diameter, 'E' on their diagram (which is what's hard to press into the control arm). That's ~ 41/42 mm.

=)

_________________
Quote:
No one expects the Spanish Inquisition!

Spanish Inquisition Racing chip burning service--build yourself a custom chip!
http://www.teamswift.net/viewtopic.php?f=17&t=57216


Top
 Profile  
 
PostPosted: Wed Sep 26, 2012 5:37 pm 
Offline
Suzuki Elder
User avatar

Joined: Mon Dec 01, 2003 12:47 pm
Posts: 11675
Location: columbus, ohio
as an update to this ancient, legacy thread - north america has a new whiteline importer and a network of authorized dealers.

i dealt with a michigan based authorized seller, never enough auto, directly. they also have ebay listings that are the actual list prices.
http://www.ebay.com/itm/Whiteline-W6146 ... es&vxp=mtr

that's the outer rear bushing that fits the ear on the rear knuckles for all metro/ swift models 89 thru 2001.

whiteline also stocks the front +caster kit, the rear control arm bushings (forward and rearward inner bushes and the rear outer shown above in the ebay link.)

this thread is as relevant now as it was 7 years ago and reading this and following the examples discussed still turn a suzuki variant into a freaky racer.

_________________
1991 Blue Geo Metro Convertible highly modified 1.0L Turbo3 5 spd. - 1991 Red Geo Metro Convertible customized with a Twincam 5 spd.

My Turbo3 Project
My Cardomain Page -Ol' Blue
My YouTube Channel
My Photo Gallery
SAAB Sonett II


Top
 Profile  
 
PostPosted: Mon Jun 02, 2014 2:50 pm 
Offline
User avatar

Joined: Tue Feb 28, 2012 4:35 pm
Posts: 828
Location: Hamilton, Canada
:goodpost:

So just the front one is the toughie??

_________________
___________________
89 Swift gti
Modified B16 P29 75mm pistons,13:1CR, cultus intake, genie header, genie exhaust, 3tech head, 3tech 222/365 cams, 3tech UD pulley, megasquirt 2.0, 60mm throttle body, Aluminum flywheel


Top
 Profile  
 
PostPosted: Mon Jun 02, 2014 3:56 pm 
Offline
Suzuki Elder
User avatar

Joined: Mon Dec 01, 2003 12:47 pm
Posts: 11675
Location: columbus, ohio
i used the whiteline bushing set and it was much easier to cut them in the center and set them in from both ends.

the rear block bushing is what really sets up the positive camber. the hole for the shaft at the rear of the control arm is off center by a good bit which changes the angle of the control arm when mounted. the washers on the front bushing pull the control arm forward but the real magic is the big block bushing at the rear position.
Image

_________________
1991 Blue Geo Metro Convertible highly modified 1.0L Turbo3 5 spd. - 1991 Red Geo Metro Convertible customized with a Twincam 5 spd.

My Turbo3 Project
My Cardomain Page -Ol' Blue
My YouTube Channel
My Photo Gallery
SAAB Sonett II


Top
 Profile  
 
PostPosted: Wed Aug 26, 2015 7:44 am 
Offline

Joined: Wed Apr 22, 2015 6:59 am
Posts: 19
Location: Krakow, Poland
I have a set of polybushes on my gti already mounted by a previous owner. I have noticed that rear control arm front bushing (D-shaped) is also asymetrical:
Image
As you can see it's not symetrical neither vertically nor horizontally.
What is interesting, on the other side of the vehicle, the bushing is put in other way, the bushings are not symmetrical to each other. Horizontally it looks like:
|-o---| |-o---|
so it looks like someone did something wrong.

I also have a bit positive camber on both of rear wheel, I wonder if proper installation of these bushings might help?
What should be best alingment for racing? Should the hole be closer to the outside or inside of the vehicle? WHat about vertical position? Should the hole be more on top or more on bottom?


Top
 Profile  
 
PostPosted: Wed Aug 26, 2015 1:34 pm 
Offline
User avatar

Joined: Sun Dec 05, 2010 5:56 pm
Posts: 1035
Location: Wahiawa, HI
So, the only reason to mount the bushings like that in the rear is either to counteract frame damage that has somehow twisted the car or because you don't know what you're doing. There is no alignment benefit for racing that I can think of.

If you measure all the points on the frame and the distances are correct, then they are incorrectly installed--further, because there is not much reason to do this in the back, I know of no manufacturers that actually make rear D bushings with an offset hole, so maybe they are bushings intended for the front and installed on the back?

If the ones on the front are symmetrical, then you should try swapping them so you can get caster in the front :roll:

_________________
Quote:
No one expects the Spanish Inquisition!

Spanish Inquisition Racing chip burning service--build yourself a custom chip!
http://www.teamswift.net/viewtopic.php?f=17&t=57216


Top
 Profile  
 
PostPosted: Thu Oct 01, 2015 4:28 am 
Offline

Joined: Wed Apr 22, 2015 6:59 am
Posts: 19
Location: Krakow, Poland
I have question about increasing front caster.
1. Isn't using only washers enough? Cannot I put for example 5 washers on the rear bushing to pushe the whole control arm even more to the front?
2. The front and the rear bushings are in one line. When pushing the whole in the rear bushing outside (using the assymetric rear bushing), isn't it going to put some stress on the front one, since they are not in the line any longer? I mean, Pushing the whole control arm outside is just turning it a couple of degrees, and the turning center point is going to be the front bushing.


Top
 Profile  
 
PostPosted: Thu Oct 01, 2015 7:29 pm 
Offline
User avatar

Joined: Sun Dec 05, 2010 5:56 pm
Posts: 1035
Location: Wahiawa, HI
Quote:
1. Isn't using only washers enough? Cannot I put for example 5 washers on the rear bushing to pushe the whole control arm even more to the front?


It does make a difference, even without the offset rear bushing, but you'll find you don't have room for that many washers, particularly if you also want to use a front brace, and you do want to do that. I found that one extra washer of the same dimensions as the original is all I could fit and still run the brace--and I had to use the brace without another washer in front so I felt I needed to loctite it to make sure it wouldn't loosen.

Quote:
2. The front and the rear bushings are in one line. When pushing the whole in the rear bushing outside (using the assymetric rear bushing), isn't it going to put some stress on the front one, since they are not in the line any longer? I mean, Pushing the whole control arm outside is just turning it a couple of degrees, and the turning center point is going to be the front bushing.


Yes, I suppose the front bushing will be slightly misaligned, but in practice it is not a problem. If you think about it, the second sentence you wrote is correct, and explains exactly why this is done--a very small forward rotation of the control arm at the front pivot translates into a significantly larger forward displacement of the ball joint (at the far end of the lever) generating a substantial increase in caster.

_________________
Quote:
No one expects the Spanish Inquisition!

Spanish Inquisition Racing chip burning service--build yourself a custom chip!
http://www.teamswift.net/viewtopic.php?f=17&t=57216


Top
 Profile  
 
PostPosted: Sun Oct 18, 2015 7:27 am 
Offline

Joined: Fri Sep 21, 2012 9:23 am
Posts: 178
Location: Mount Vernon, WA
Whiteline has gone all black and doesn't have the 1.5 castor correction front control arm bushings in yellow anymore. It will be black. Just thought I would post this for all of you who didn't want yellow on your car anyways.


Top
 Profile  
 
PostPosted: Mon Nov 28, 2016 8:51 pm 
Offline

Joined: Fri Sep 21, 2012 9:23 am
Posts: 178
Location: Mount Vernon, WA
I thought I would add this to this post. The rear lower hub bushing from whiteline is not an exact fit. The first side I made a brass bushing sleeve to accommodate for the diameter difference. I know people have installed this successfully without since it is compression motion. However, I like things fitting right. The second one I torched out the old bushing and ground down the metal sleeve to fit. I also had to grind down the out side of the sleeve to almost nothing.

Image
Image


Top
 Profile  
 
Display posts from previous:  Sort by  
Post new topic Reply to topic  [ 86 posts ]  Go to page Previous  1, 2, 3, 4

All times are UTC - 5 hours


Who is online

Users browsing this forum: No registered users and 1 guest


You cannot post new topics in this forum
You cannot reply to topics in this forum
You cannot edit your posts in this forum
You cannot delete your posts in this forum
You cannot post attachments in this forum

Search for:
Jump to:  
Powered by phpBB® Forum Software © phpBB Group