Don't let six little tabs and some brushes get in the way of repairing your cooling fan; it's a vital component of your transportation!
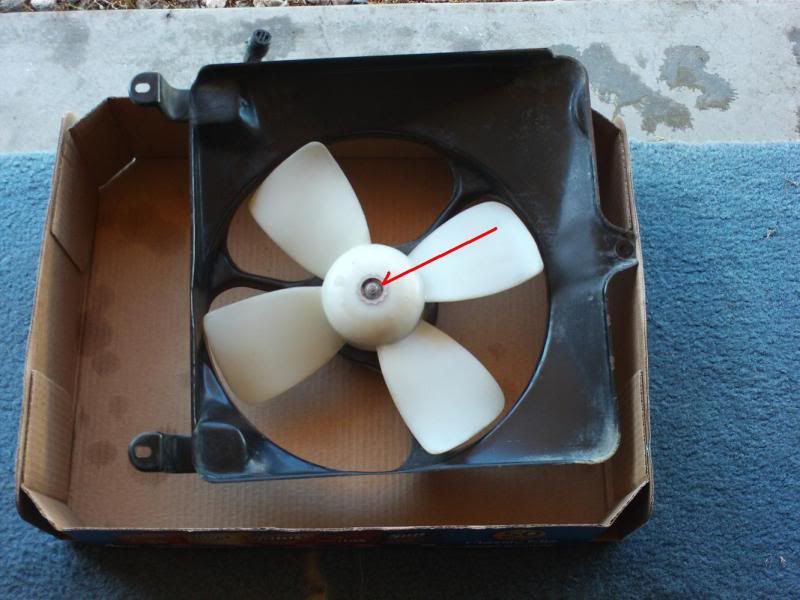
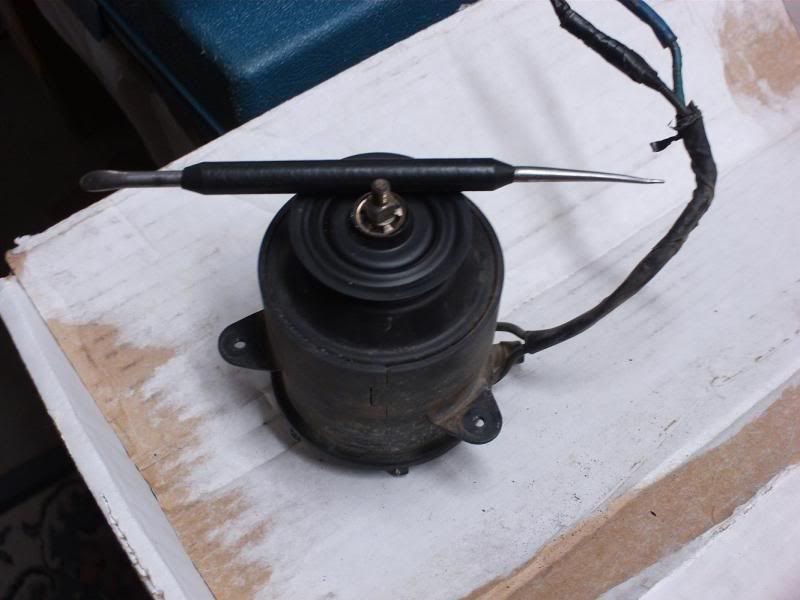
Let's begin with a typical electrical fan and shroud from a 1987 Chevrolet Sprint:
At the writing of this first post, RockAuto.com lists the fan as still available and $80 plus shipping.
Autozone lists it as
NOT AVAILABLE. Moving on...
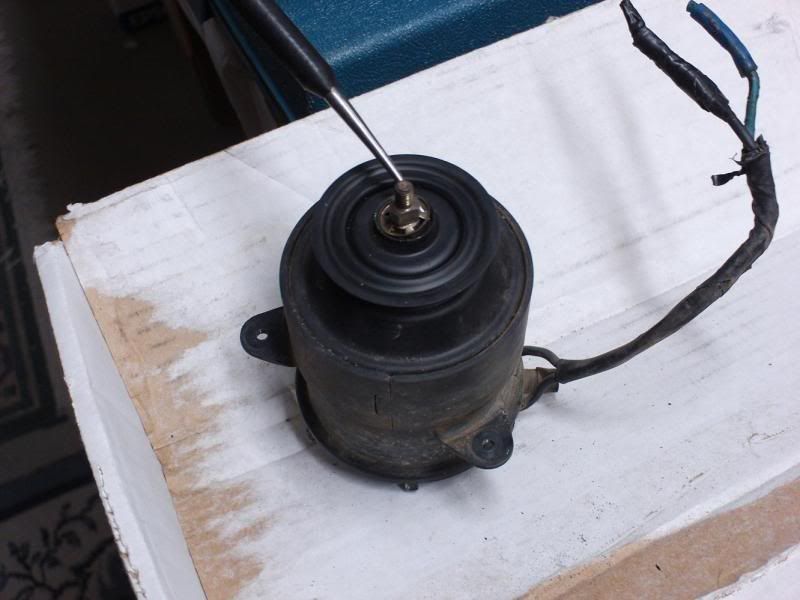
Use an 8mm socket to remove the fastening nut at the center of the fan (red arrow).
Once that is done, we can look at the back side to see the drain tube currently at the 10 o'clock position:

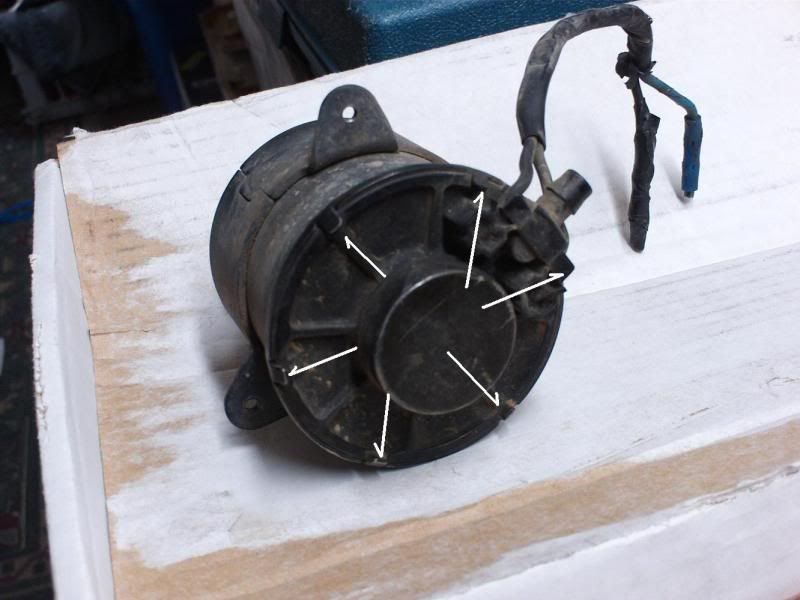
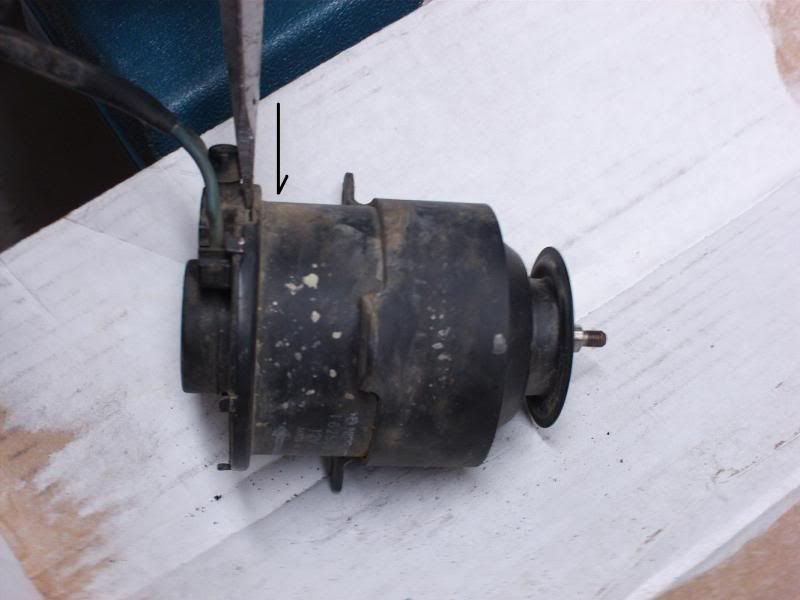
Next, we show a picture locating the three philips head machine bolts which should be removed:

After that, you see we will be eliminating the shroud from the picture.
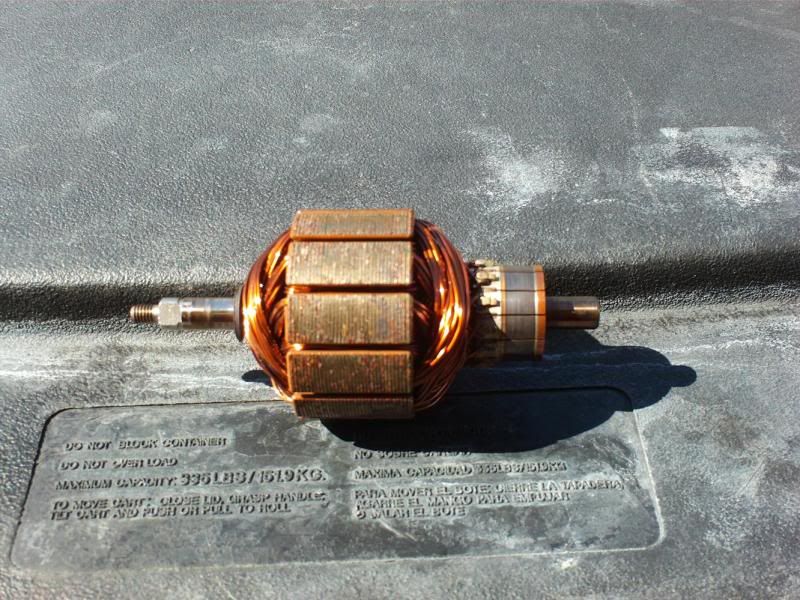
First, a look at an old electrical motor next to a good one, for comparison:

You cannot see any visible difference from the exterior.
Later in the post, you'll see the problem.
At this point, you might be tempted to put 12 volts to the motor and see if she spins.
That may or may not help. So let's continue.
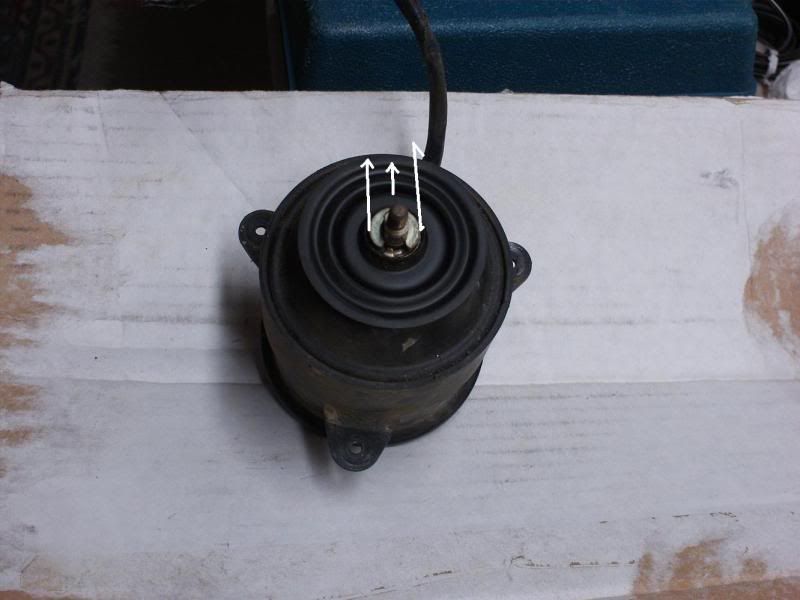
You will need to bend the six tabs at the ends of the white arrows here:
Bend them straight, so you will be able to pull the rear 'brush plate assembly out.
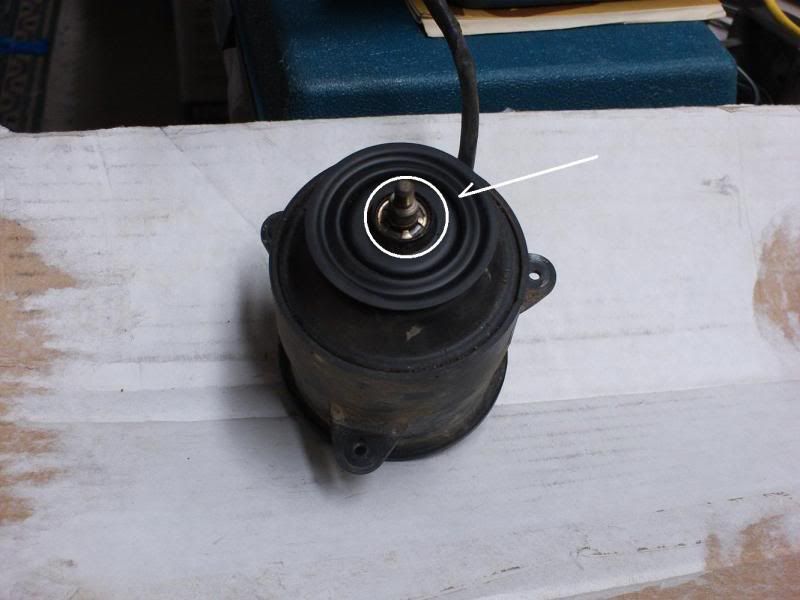
Back to the front (yes, I wrote that!) and you will see a slotted washer which should be slid off the shaft.
It is between the white arrows, and the arrows point in the direction the washer/keeper should be slid.
Now we focus our attention in the center of the little white circle:
This is the worst part of the whole disassembly process, although it's not too bad if you use the right tools, so pay attention:
First, you might use a dental probe to pry the little fingers up a bit:

Once you get a little clearance under the fingers, you can use a larger probe
To get underneath like this:
Now that the 'keeper ring' is pried out, set it aside; it can be rebent and reused. Return to the rear of the motor for the final removal.
Take a fairly large flat screwdriver and carefully insert it like so:
Next, you twist it a little and the rear plate can be removed. It might be stuck on a little from age, so be patient.
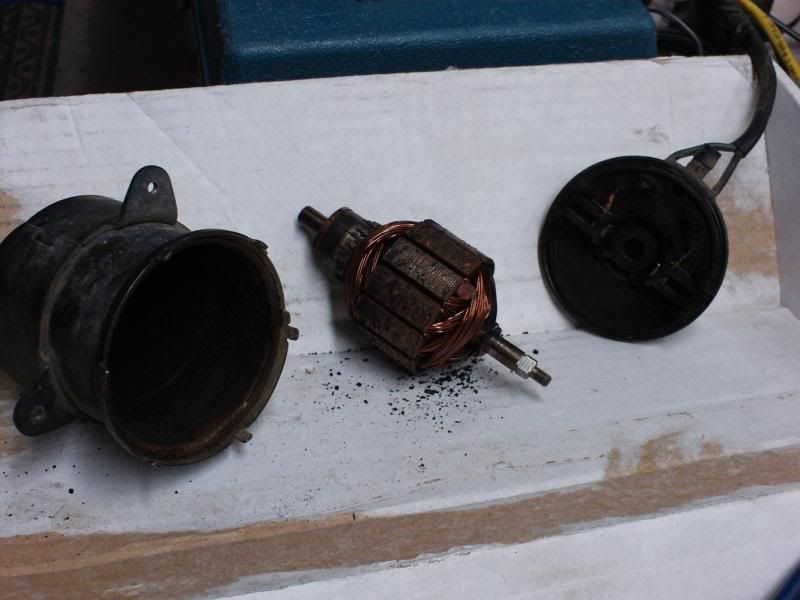
Once the rear plate is removed, you'll need to actually pull the armature out by hand.
The magnets attached to the casing are strong enough to keep it in place, so you'll have to use a little muscle to overcome their force. This should net you these 'three blind mice':
Now the fun begins.
I use a little Simple Green and an old toothbrush on the windings and armature:
In less than 5 minutes, it's as good as new.
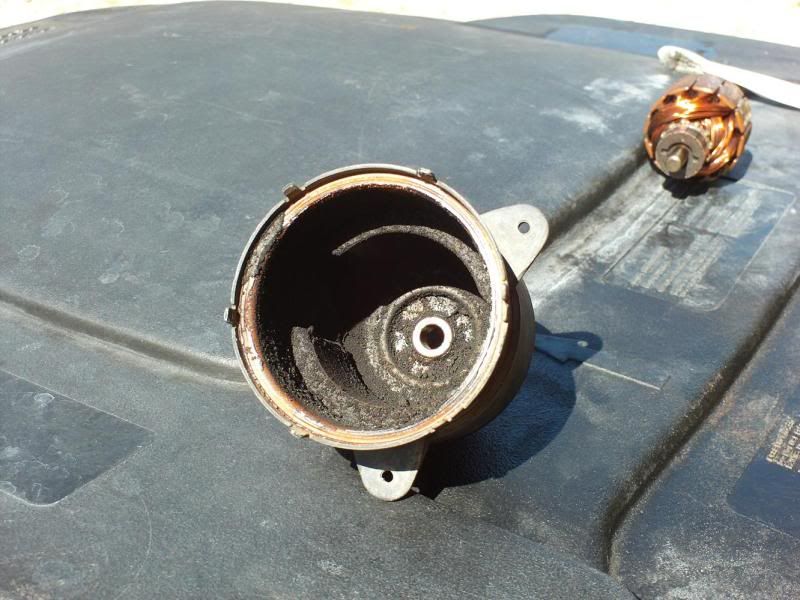
The casing is the depository for carbon - carbon which has been ground off gradually over the years by the armature.
So it's pretty dirty upon first inspection:
But again, 5 minutes after a little Simple Green/old toothbrush and she's ready to go again:
I wanted to add a little 'caveat' at this point.
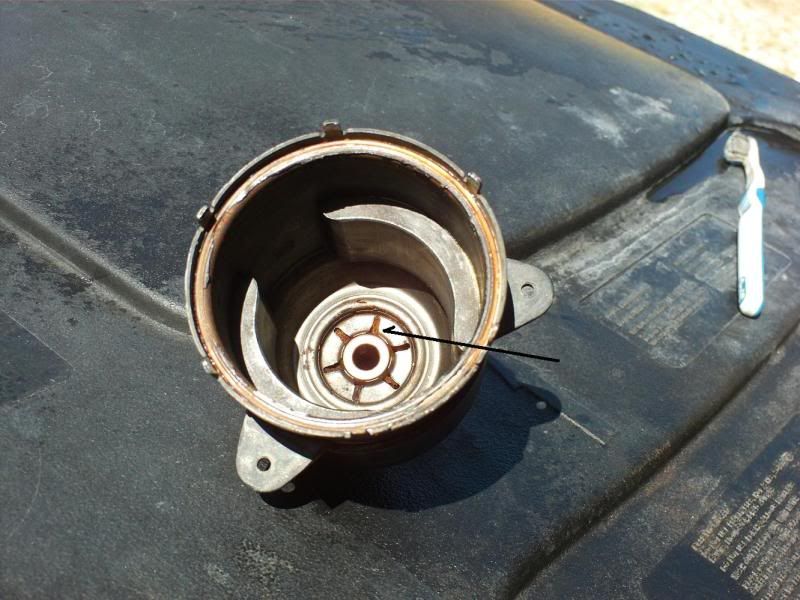
If you look at the black arrow, you will see a section of the housing which has a felt/fiber insert.
When you clean the parts, be careful about hitting that with high pressure compressed air or you will lose all that material which can be soaked with a lubricant.
Someone was asking for some information on maintaining/lubricating their fan motors:
viewtopic.php?f=22&t=48163A few comments are in order (at the risk of hurting someone's future internet sales?)
-to lube the motor properly, you need to take it apart.
-there are no bearings in this motor, however, it does have two bushings
-check and make sure that the housing magnets have not cracked/separated from the case once cleaned.
Now, on to the last bit...
Once you've got it all cleaned up and apart (15-20 minutes, if you've taken note of all the tools I used) it is time to inspect the backing plate, usual source of the problem:
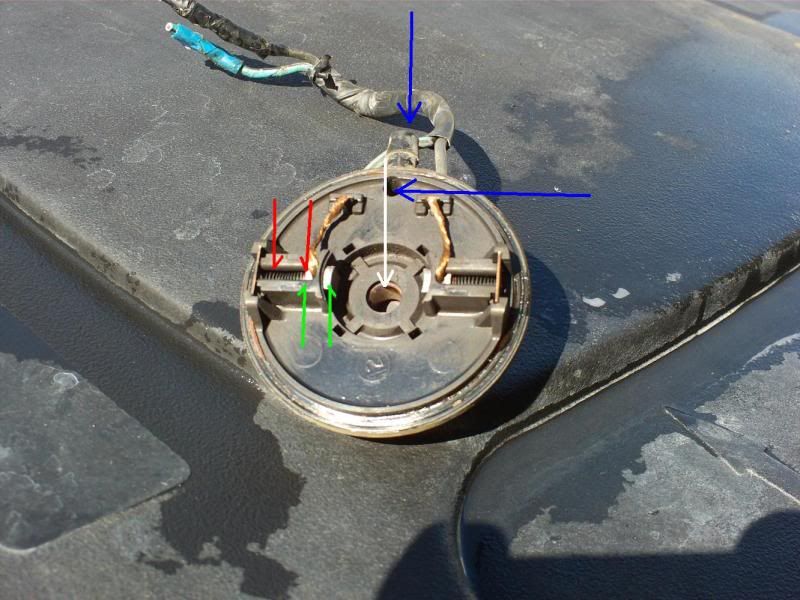
Sure enough, we've located a bad motor. Take note:
1.) Between the GREEN arrows: This is the current location of the brushes. They are at the end of their service life.
Just like rings/rod bearings/valve stems/etc. certain parts will wear. In our electric motors, the brushes are the first to give out.
2.) Between the RED arrows: This is the location the square brushes have lost. They were longer originally. So now, the spring does not push 'as hard' on the brush against the armature. Thus you may put 12 volts to the motor and she spins fine, but with the added work of the plastic fan, she won't spin, or will spin occasionally.
3.) At the 2 BLUE arrows: This shows the exit (top) and entrance for the drain which we mentioned earlier in the post. If you've never seen the inside of a radiator fan, you might think you could invert the fan, add oil, and you'd be lubricating the rear bushing. Unfortunately, that's not the case. Perhaps if you would fill it completely with oil? That would be very difficult, although an easy (?) thing to try; it'd make a mess for weeks.
4.) At the WHITE arrow: a bushing.
You can easily repair your electric radiator fan motor if you are willing to spend a half hour taking it apart. There are no special tools, no welding, no soldering, and no special reamers to buy - unless you wish to replace the bushings...but let's save that for another thread.
In MOST motors, the brushes can be purchased and installed by the end user. If exact replacements can't be found at the hardware store, you can get some which are similar and file them to fit. In addition, I'm sure there are plenty of Teamswift members who have done this and have an excellent on-line source for the brushes. Right?
If you are reading this and still have your parts sources, kindly post away!
As far as lubricant, you will find many different lubricants depending on your 'mechanic', but in the old days we used to use 30 weight dino oil. Now, a synthetic might be more available and durable. Perhaps others have more experience in this matter. I've used turbine oil of late as well. Don't forget that felt 'wick'. It should get soaked.
This thread started out repairing an electric fan motor - an early model: 1985-1988!
Hopefully, someone will post a newer one...perhaps with bearings?
Or more importantly, where they find the cheapest source of brushes?
Years ago, my Father built a simple electric motor using a piece of wood with
5 nails
an inverted test tube
a piece of cork and
some insulated wire
for
my 
Science Project (thank God for Parents!).
Looking at this fan motor reminded me of our little project.
Years have passed, but the basics are the same...
So now I've passed some of my experience, thanks to Teamswift...
...to you!
Slightly off topic, here's a little piece of advice:
From my personal experience operating vehicles in the desert:
80 plus percent of cooling problems on a GOOD engine (good compression/losing no coolant in the overflow tank) can be traced to the
radiator,
10 per cent or less on a faulty
thermostat or
loose water pump/alt belt,
5 percent or so on a bad
fan or
water pump, and
5 percent to the ubiquitous 'et cetera'.

Do NOT delay in fixing your cooling system; overheating the engine just ONCE is a very bad thing.


